Wednesday, September 30, 2009

Great Room Project, Wednesday 9/30

Day Four: Painting!


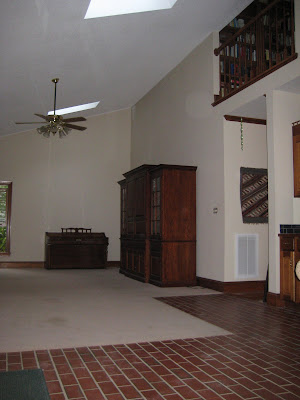
Okay. It's about time to make a real, observable, visual difference in this room! Paint always helps with that. Might as well start with the small, low walls, and move on up to the big, high ones as I progress around the room.
.
Not a lot to report on technique or tools here - painting is painting.
.
Mask or use an edge shield around the windows and fireplace. Cut in the ceiling/wall interface carefully by hand.
.
I only used a gallon of paint on the first three walls. I was suspicious when they said a gallon covered 400 sq.ft., but it looks like they are right. I have somewhere around 700-750 sq.ft. to paint in this room.

.
.
.
.
Hot Shot Quiz Question for you digital photography people: what causes those light-colored, round artifacts in the picture on the left? The ones that look like floating bubbles. I've see these on a couple images I've taken this past week.

Great Room Project, Tuesday 9/29

Day Three: Move stuff and prep the walls for painting

Now, HERE"S a low drama day, photographically. Fill holes with spackle. Sand smooth. Whee!

This actually involved a lot of climbing around on ladders. Skills learned from years of rock climbing came in handy. When the painters took down their masking around the wall/ceiling corners, some small bits of wall paint came off with it. These had to be filled and sanded, along with any overspray lines. I got to use my new pad sander. And make some dust.

The visual difference between Day Two and Day Three, as observed from more than three feet from any wall surface, looks like this:


.


Great Room Project, Monday 9/28

Day Two: Baseboards out.

Today’s task was to extract the wood baseboards. This step really can’t count as “Demolition”, since I needed to reuse pretty much all of the trim, which complicates matters somewhat. The baseboard trim was actually in two pieces: a basic 1”x6” rectangular board, topped with a piece of fancy milled trim. The guys who originally put in this trim got pretty happy with the nailer. These bits were really stuck in place!

Here are the tools: crowbars are good. Putty knives are good for breaking any paint seal. The big putty knife was good for protecting the wall while using the prybar, at least until it broke. I’ll blame it on one of the rabbits. Pliers for pulling out nails, hammer for whacking things in general.

It probably didn’t help that I still had the carpet in place, since that would have made prying from the bottom easier. But I hadn’t cleared the room of the big, heavy furniture pieces, and I figured it would make a fine drop cloth for painting.

Again, not a lot of drama in the end o’ the day photo. Just the same room without some wood bits. Whoopee. Yay, me.


The gold/orange/brown area on this wall is the test spot for the new paint. My local Lowe’s (My favorite place. I save hundreds of dollars there. Every week.) will sell you a mini-can of any color you want for $3. Deal.


Bruno says: “Hey – don’t blame ME for destroying your putty knife!”


I ended up breaking just one piece of the milled trim, but it was glue-able. I also had to glue a number of bigger chips that happen when you extract a nail from a hunk of finished wood. No big deal, either one.

Tuesday, September 29, 2009

Great Room Project, Friday 9/25

The great Great Room makeover is officially underway!


Here's the rough game plan:
- paint ceiling
- pull off baseboards
- paint walls
- tear out wall-to-wall carpeting.
- install hardwood floors
- baseboards back in.

Somewhere along the line we need to find a new couch and maybe a chair or two. We're thinkin' IKEA, since they just opened up a store in Charlotte, and have such good meatballs.

The room was blessed (as in "bless your heart" - Southerners know what that really means!) with a textured popcorn ceiling. It was there when we bought the house 14 years ago. I guess they are easy to install and cover a range of drywalling sins. So the project has to start with ceiling. I didn't really want to deal with either:

1) trial and error learning spraypaint technology

2) rolling paint with an ultra-thick napped roller, onto a surface of questionable integrity, that angles from 9' to 14' high.

So I called in the pros on this one. They came in on Friday morning, temporarily entombed the entire room in plastic, did their thing, and were out in about 6 hours. I didn't think to take pictures of this operation. Dang!

Here are some not-so-exciting photos. What do you expect - it's just a plain white ceiling! Not a lot of drama there. But it did brighten the room up quite a bit. I guess dinginess happens after 14 years.


I had time in the afternoon to run up to Lumber Liquidators and load the Rockvahn up with hardwood for the floors. Let me tell you - that thing was riding low on the way home!


Sunday, September 27, 2009

Carb O' the Week

Yikes! It's been decades since the BlichBlog has been updated. No better way to break the bad old non-posting habit than with a new Carb O' the Week, eh?

Let's start with this evening's "Stump the Chef" dinner, with apologies to NPR's Lynne Rossetto Kasper. In the fridge was:

  1. one green pepper


  2. some 'shrooms


  3. an onion


  4. two leftover grilled Italian chicken sausages.


  5. some chopped up garlic in oil


  6. leftover whole wheat ziti


  7. feta cheese

Chop up 1-4 as needed, saute in olive oil with the garlic, throw in pasta, season with s+p and basil. Sprinkle with feta. Eat.