Showing posts with label errors. Show all posts

Thursday, March 4, 2010

Since we’re on a Caveman Carpentry kick...

Bass Stand

Anything that starts life as a piece of framing lumber qualifies as Caveman Carpentry. Here’s a double bass stand that I made. I got the idea from Jake de Villiers, who runs The Bass Spa in Vancouver, BC. He had an example posted on one of the TalkBass forums.

.

Since it has to live in my great room, I wanted it to look at least half decent. I used a less-than-shabby pine 2"x10"x8' for the stock. Cut it up, screw it together. Countersink and plug the screw holes. Sand, stain, seal with danish oil. Glue cork on to the contact surfaces. Caveman carpentry at it's finest!

Errors / things that needed tweaking:


1 - The board I picked out had good grain and was nice and straight, but turned out to have a slight cup That made the build-up more challenging and the end product look slightly more, umm, "rustic". Live and learn.

.

2 - I'm 6'0" tall, and play with about 7" of endpin out. If I had made the whole thing just 1" taller, I could just drop it right into the stand without having to stop and adjust the end pin first. Sometimes it's that extra 30 seconds of putzing around that stops me from just picking up the bass and playing for a few minutes on a whim.


Remedy: install those little elevator blocks on the bottom. Inelegant, but still not shabby.

Wednesday, February 3, 2010

Cooking Errors

Always a fun topic. In the kitchen, not everything goes right all the time, as even Julie Child could attest.

1) I made a pot roast in the Romertopf clay baker last week. I had really forgotten that we owned one. But I heard my cycling buddy George going on about how he had just gotten a Romertopf and how great it was. So I dug it out. I had a big, honkin' pot roast from Costco, along with the traditional potatoes, onions, and carrots. The first recipe that came up on Google said 425°F for two hours. Well, that was not quite enough time to tenderize that tough old hunk o' meat - the veggies were great, though! I had to run out to a band rehearsal, so Betsy was tasked with the rest of the roasting. Well... time kind of got away from her. (I suspect knitting was involved!) I came home to a clay baker that now contained seven charred, dessicated rectangles that had been pot roast in a former lifetime. Should have taken a picture!
.
.
2) This is what happens when you are late at adding the chopped nuts and raisins to the bread machine. It was too far into the knead cycle to incorporate all the bits. They essentially stuck to the outside. The raisins kind of got a bit, umm, toasty. Kind of a short loaf, too, but tasted good once you plucked the burnt up raisins from the surface...


.
.
3) The old waffle maker croaked back before the holidays. Fortunately, Santa gave someone - guess what? - a new waffle iron for Christmas! Go Santa! The first waffle didn't turn out so great, though. They did get better after that.

.

.

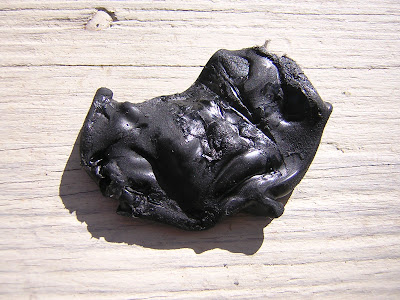
4) And this is what happens if you deep fat fry a chunk of plastic by mistake:

Friday, October 30, 2009

Great Room Project Update, Thursday 10/29

Trimmaster

All that is left is trim. And all the trim is finished, dried, and ready to cut and install. So the goal today was to finish things up!

The base cap went back up, no sweat. The section I had to buy and stain blended in just fine. The base shoe pieces were easy to miter, piece together, and nail to the baseboard. After that, more stained wood filler went into the nail holes in the trim.

Did I say just how GREAT a tool a pneumatic finish nailer is? I can’t imagine doing a project like this without it, especially working by yourself. It allows you to hold things with one hand, and nail with the other. Zap! Zap! Zap! Just that fast. And you don’t even have to countersink the nail heads, since you can set it to fire hard enough to bury the heads slightly. Gotta like that!


Nail with one hand, do something else with the other.

Note the cool hand knit vest.


On to the last bit – installing the threshold trim pieces where the bricks and hardwood meet. Once installed, the elevation of the hardwood is maybe 3/8” higher than the bricks. So there has to be some sort of transition piece. I used these “baby thresholds”, and mitered them in around the corners. This was a bit easier than the “in place and level” mitering I did around the fireplace. But it was going to be very visibly exposed, so I took my time and did it right! I think it turned out okay. I had to futz a bit at the corner where three different trim bits intersected, none at the same level. There is probably an elegant way to do this, but if I ever did figure it out, my Caveman Carpenter status would be revoked for sure.


So… The wood is down and the project is done, at least from a construction standpoint. I just have to move furniture and things back in without doing any damage. (Just…)


We decided to celebrate with a glass of Goat wine. Not sure if it is made BY goats, or FOR goats, or for consumption WITH, say, goat stew. But either way, if goats are somehow involved, how bad can it be?


===================================================================


I really only found one thing that I would do differently next time (so far...). I mean other than NOT lose that piece of trim. I would make an elevation transition, like the brick-to-hardwood, with a tapered transition piece instead of a threshold. More like what I did around the fireplace. It would be a smoother look. Here is the difference:


I came up with the transition scheme after reading about it online and asking the Lumber Liquidator folks. I was worried about leaving an expansion gap around ALL the edges. But it turns out that that's not strictly necessary, at least in this part of the country where season-to-season temperature and humidity swings are not that extreme. Live and learn.